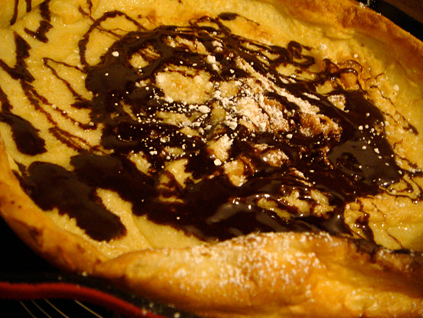
Jun 1, 2009

Kitchen Closed

First of all, I'd like to thank the faithful readers of Heart Homecooked - I know posts have been rather sparse around here. I've been putting off this decision for a while now, coz I was determined to make it all work somehow. Sadly, I've come to the realization/conclusion that something's gotta give. I've been spreading myself too thin and my other projects have suffered in the process. Ironically, I haven't had the energy nor the time to cook anymore!

So again, thank you very much for sharing your time with me and I hope you keep in touch by reading Lifeflix (my personal space) and Heart Handmade. If you wince at the thought of anything tech related, give Heart Hi-Tech a chance - Hillsy does a fabulous job of explaining and presenting the latest/need-to-know in a very easy & accessible way! Even our grannies can swallow!

May 13, 2009

Beer Can Chicken


If you find yourself totally bored on a Sunday afternoon and you happen to have a grill, a 5lb bird, a can of beer or soda and couple of spices... boy do I have the perfect project for you!!!

I can't take credit for this one, the boy came up with this one all on his own (the idea to actually do it, not the recipe). The chicken came out VERY VERY juicy. The texture is similar to steamed chicken or what I would imagine Sous-vide chicken would be like.


Soak flavored wood chips (we used Hickory) over night or for at least 5 hours. Make sure your grill is nice and hot. Distribute coals to the sides as opposed to the middle.

Cover the bird with 1 cup of your favorite dry rub (I used a mixture of salt, pepper, cayenne, paprika, cumin).

We used an empty soda can and I punctured extra holes on top with one of my cooking thermometers - this allows for more beer/soda steam. More steam, the juicier/tastier the meat gets. Use about 3/4 can of liquid. We used a mixture of beer and 7up. Our neighbor suggests using a can of Coke - I like the sound of that!


The hardest part is getting the can inside the cavity and balancing the whole thing on top of the already HOT grill without burning your hands off. I suggest sitting the bird on top of the can on your kitchen counter then VERY carefully transferring it to the hot grill (obviously holding the can in place with one hand, as you walk it to the grill). As opposed to the way we did it here.


Cooking time is approximately 2 hours. After 1 hour, check on the bird and add more woodchips. Cook for another hour or until it reaches 170F degrees (thickest part).


Remove from grill and allow to rest for at least 10 minutes before carving. Oh and don't forget to remove the can :)

May 5, 2009

Grilled Tilapia with Chimichurri


Another quick and tasty meal. I used frozen tilapia fillets I bought from the supermarket. Thawed and marinated in a couple of tablespoons of Chimichurri for an hour or so. Make sure the grill is nice and hot. Cook each side for approximately 4 minutes - the amount of time really depends on the thickness of your fillets. Try not to handle the fish before it's ready to be turned, specially if you're using a thinner cut fish - it's breaks apart easily. A basic guideline - once it turns opaque, it's ready to be turned.


Top with an extra dallop of Chimichurri sauce. I served it with buttered corn and refreshing watermelon slices.

Apr 27, 2009

Filipino-style BBQ


Every Filipino family has their own version of this recipe and you'll be hard-pressed to find someone who is willing to give up their secret recipe... what you will get instead is a "basic" recipe and it'll be up to you to create your own "secret recipe" by adding your own spin to it.

If you're not feeding an army, you'll need to adjust the amounts. Everything is pretty much to taste so I urge you to taste the marinade and adjust everything to taste.

10 lbs of pork butt (cut into thinnish bite-sized pieces)
1/2 bottle of 7-Up (my sister says it HAS to be 7-Up)
Juice of 6 lemons
2 cups of brown sugar
1 cup of finely minced garlic
1/2 cup of finely minced onion
kosher salt * this is to taste, I use 1/2 cup add little by little so you don't go overboard
hot sauce * again according to taste

Mix everything and taste - the key is to make sure that it's both a little too sweet & salty.

You have to marinate the pork for 2 days. You can try to get away with marinating it overnight but really it's 10x better if it's for 2 days. Oh and make sure you seal the container well, or else everything in your fridge will smell of garlic!! Soak bbq sticks in water overnight. Soaking helps prevent the sticks from fully burning in the grill.


1. After cutting pork (include the fat too!). Boil a large pot of water. Poach pork pieces until it's no longer pink ( a few seconds) then strain. My sister (the best cook in the family) says that poaching it allows the flavor to seep into the meat even more. I'm not really sure how that works, but I usually follow everything Cheryl says - you don't understand how good her cooking is :) So yes, I do follow her blindly when it comes to cooking.
2. Once you've drained out the excess water, transfer pork into a container that can be sealed tightly. Add marinate mixture to pork and marinate for 2 days.
3. Remove pork from fridge and allow to it to come to room temp prior to cooking. Make sure your grill is super super hot. The key is to char the meat but not to overcook it, because it will dry up.
4. Thread pieces onto sticks.
5. Grill until edges are charred on both sides. Turning only once.

I know the meat is already dead, but Trust me, in this case the more charred the better.

Apr 21, 2009

BBQ Chicken Pizza

One of the easiest things to make for dinner!


You'll need:

Ready-made pizza crust (or you can buy pizza dough, make your own, whatever you have time for)
2 cups of cubed chicken breast fillet
1 cup each of shredded mozzarella and smoked gouda cheese
1/2 big red onion, sliced in rounds
olive oil
1/2 cup of your favorite store-bought BBQ sauce
small handful of fresh cilantro

Prep: Preheat oven to 450F degrees. Cube chicken and season with salt and pepper, shred cheese and slice onions.


Heat up a non-stick skillet and add about 1 tbs of olive oil (heat up). Add chicken and quickly toss around - just when you see that the pink is almost gone, add in the BBQ sauce and cook for another minute or two. Remove from heat and allow to cool down a bit.

In the meantime, take out your ready-made crust and drizzle the top with a little bit of olive oil, brush or use your fingers to spread it evenly. Drizzle a little bit of BBQ sauce on top. Top with 1/2 of the cheese, add chicken, then sprinkle the rest of the cheese over the chicken.

note: The crust that I used had tiny little holes so I made sure to put the whole thing on top of a sheet of foil, first time I made it - the olive oil dripped through and made a mess.

Top with sliced onions and another drizzle of BBQ sauce. Lower temperature to 425F degrees. If you don't have a pizza stone, you can use a large baking tray. I just turned it over and used the bottom - so it was nice and flat (see pic 8). You can also turn over and use the bottom of a large cast iron pan. Bake for 10 mins. I like to turn the heat back up to 450F degrees at the 7 minute mark.

Remove from oven and top with fresh cilantro (coriander). Unlike parsley - both stems and leaves can be used. Enjoy!

Apr 16, 2009

Almost Chicken Veronique


Here's another tried and tested recipe. I've been making this for years, ever since I saw it on Rachel Ray's 30 minute meal show. I love anything sweet and savory and if it calls for cream even better! I love how the red grapes off-set the tanginess of the stone-ground mustard based sauce. It kind of reminds me of Chicken Francais but with a little more ooomph. A definite must-try. It's perfect over cous cous or black wild rice (as served here).

You'll need:
2 tablespoons extra-virgin olive oil
1 tablespoons chopped fresh thyme leaves, stripped from 6 to 7 sprigs
Coarse salt and pepper
2 tablespoons butter, cut into pieces
1/4 cup all-purpose flour, eyeball it
2 pounds chicken tenders
1/2 cup white wine, eyeball it
1/2 cup chicken stock
1 cup heavy cream
1/4 cup grainy, stone-ground mustard
1 1/2 cups, about 1/2 pound, seedless red grapes, halved


step 1. Heat a large skillet over medium to medium high heat; add 2 tablespoons extra-virgin olive oil, 2 turns of the pan, and 2 tablespoons butter to the pan.

step 2. Place flour in a shallow dish.

step 3. Season chicken with salt and pepper then dredge the tenders in flour and add it to the pan.


step 4. Cook chicken 7 to 8 minutes until browned. I had to do a double batch so I placed the cooked ones on a paper towel. Transfer all of the cooked chicken back into the pan and add wine and scrape up browned bits as wine cooks down and bubbles, 30 seconds. You'll notice that the sauce will start to thicken once the alcohol evaporates. The flour coating on the chicken actually helps thicken the sauce, creating somewhat of a roux.

Add 1/2 cup stock and thyme to skillet.


step 5. Combine cream and mustard and add to stock. Add grapes to the pan and turn chicken and grapes to coat and combine with the sauce. Simmer 5 minutes over low heat.

Apr 7, 2009

Foolproof Pie Dough... I swear!

I used to be the world's worst pie crust maker, but then I discovered an article in Cook's Illustrated.The article described the science behind pie dough - "The Theory of Pie". They tested and tested until they found a recipe and method that not only baked up tender and flaky every single time but also rolled out easily. Turns out that one of the key steps is to divide the flour into two batches, reserving about 1/2 of the flour for a later step. The first batch would be unified with the butter completely. Then the reserved flour would be added and mixed into the butter and flour mixture until it was evenly distributed. I don't want to get into the science behind it, but it basically has something to do with the balance of gluten (uncoated flour) and fat (butter coated flour). That's why it's so hard to make a consistent crust. If you make the crust using traditional methods, there's no real way to make sure that the ratio doesn't change from batch to batch. It really is a very interesting article and worth picking up.

The final recipe uses Vodka, sounds strange right? Apparently, pie dough gets its structure from gluten, which forms when flour mixes with water. But too much can make it tough, which explains why most recipes require so little water. Cook's Illustrated suggests using vodka, which allows you to add more liquid (so the dough is easier to roll out) but doesn't toughen the crust. Oh and the alcohol vaporizes in the oven!


Martha's recipe calls for 2 3/4 cups of flour. So using my pastry cutter and my fingers, I combined 1 3/4 cups of flour with salt, sugar and butter. I like this method, because I didn't have to worry about over-mixing the butter and flour. Once the butter and flour were completely combined, I added the remaining cup of flour.


Using a pastry cutter, I quickly mixed in the remaining flour until the texture became sand like. I then folded in cold water with a spatula, one tablespoon at a time, until the dough started to stick. I ended up using 7 tbs.

Unfortunately, I didn't have any Vodka in the house but I still wanted to test out the overall technique of splitting the flour so I went ahead and tried the method using Martha's Pate Brisée recipe. I simply combined 1 and 3/4 cups of flour with the sugar, salt and butter (thoroughly mixed together) then added the remaining flour. I only had to add 7 tbs of cold water and I knew instantly that I had finally done something right. Past attempts didn't have the same doughy consistency that this batch had. My success was even more prevalent once I started to roll the dough out - it wasn't cracking or sticky! It was perfect!!!

Now only if I can get the filling perfect ;-)